


If you are integrating eSewa payment provider in NestJS or are interested in knowing how eSewa payment API handles transaction, this blog is perfect for you.
Architecture Overview
- Once the Pay With eSewa button is clicked on the frontend, a transaction will the status INITIATED, along with other provided data, will be send to the backend.
- The User will then be redirected to the eSewa Payment Portal. After a successful or unsuccessful payment, eSewa will redirect the user to the specific frontend URL with the relevant transaction data.
- The frontend will capture this data and send it to the backend for verification. The backend will then check the data integrity and validity with the eSewa server and update the transaction status accordingly
Personal Opinion: I usually prefer to keep the record of every payment request, regardless of whether it is completed or not.
Step 1: Install eSewa NestJS npm package: Link
$ npm i --save nestjs-esewa
$ yarn add nestjs-esewa
Tips: You can check the documentation of the eSewa NestJS npm package to figure out how to use it effectively.
Step 2: Create Config Module for eSewa
- Create a config module that loads eSewa-related data from the .env file.
- Register the config in the parent config file (config.type.ts).
- Update your .env file by adding the following required data.
export type EsewaConfig = {
    productCode: string;
    paymentMode: string;
    merchantId: string;
    merchantSecret: string;
    secret: string;
};

export const esewaConfig = registerAs<EsewaConfig>('esewa', () => ({
    productCode: process.env.ESEWA_PRODUCT_CODE,
    paymentMode: process.env.ESEWA_PAYMENT_MODE,
    merchantId: process.env.ESEWA_MERCHANT_ID,
    merchantSecret: process.env.ESEWA_MERCHANT_SECRET,
    secret: process.env.ESEWA_SECRET_KEY,
}));
export type AllConfig = {
app: AppConfig;
database: DatabaseConfig;
auth: AuthConfig;
esewa: EsewaConfig;
};Be careful of typos.
Tips: All credentials and data provided for test system in eSewa documentation will be included in this blog.
//esewa
ESEWA_PRODUCT_CODE=EPAYTEST
ESEWA_PAYMENT_MODE=TEST
ESEWA_MERCHANT_ID=provided_data
ESEWA_MERCHANT_SECRET=provided_data
ESEWA_SECRET_KEY=8gBm/:&EnhH.1/q
Step 3: Create Module For Payment Integration
- Create a payment integration module and register the eSewa module.
- merchantId and merchantSecret are optional config parameters. They are required only if the verifyMobile function from library is used.
@Global()
@Module({
  imports: [
    EsewaModule.registerAsync({
      imports: [ConfigModule],
      inject: [ConfigService],
      useFactory: (configService: ConfigService<AllConfig>) => ({
        productCode: configService.get("esewa.productCode", {infer: true}),
        paymentMode: configService.get("esewa.paymentMode", {infer: true}),
        secretKey: configService.get("esewa.secret", {infer: true}),
        merchantId: configService.get("esewa.merchantId", {infer: true}),
        merchantSecret: configService.get("esewa.merchantSecret", {infer: true}),
      })
    }),
  ],
  providers: [],
  exports: [],
})
export class PaymentModule {}
Step 4: Update EsewaUseCaseImp Inside infrastructure/payment Folder.
export class EsewaUseCaseImp implements PaymentUseCase {
  constructor(private esewaService: EsewaService,
              private configService:ConfigService) {}

  async initPayment(payment: Payment): Promise<any> {
    const esewaRequestDto: EsewaRequestDto = {
      amount: payment?.amount,
      productServiceCharge: 0,
      productDeliveryCharge: 0,
      taxAmount: 0,
      totalAmount: payment?.amount,
      transactionUuid: payment?.transactionId,
      successUrl:this.configService.get<string>("app.paymentSuccessUrl"),
      failureUrl: this.configService.get<string>("app.paymentFailureUrl")
    };
    return this.esewaService.init(esewaRequestDto);
  }
  async verify(data: UpdatePaymentProps): Promise<PaymentResponseProps> {
    const {encodedData} = data;
    if (!encodedData) {
      throw new BadRequestException('Data missing for validating eSewa payment');
    }
    const esewaResponseDto = await this.esewaService.verify({encodedData});
    if(esewaResponseDto?.status?.localeCompare('COMPLETE')!==0){
      throw new InternalServerErrorException("Error in esewa payment validation. Please contact admin")
    }
    return {
      paymentProviderId: esewaResponseDto?.refId,
      status: TRANSACTION_STATUS.SUCCESS,
      transactionId: esewaResponseDto?.transactionUuid,
      totalAmount: esewaResponseDto?.totalAmount,
    }
  }
}- InitPayment method
The success url and failure url data is linked from another config in the project. The Payment class includes amount and transactionId fields. An esewaRequestDto object is created using above data, and the init method is called. Init method is responsible to provide data in format of EsewaDto.
export interface EsewaDto {
    //Amount of product
    amount: string;
    //product_service_charge Service charge by merchant on product
    product_service_charge: string;
    //Delivery charge by merchant on product
    product_delivery_charge: string;
    //Tax amount applied on product
    tax_amount: string;
    //Total payment amount including tax, service and deliver charge. [i.e total_amount= amount+ tax_amount+ product_service_charge + product_delivery_charge ]
    total_amount: string;
    //A unique ID of product, should be unique on every request
    transaction_uuid: string;
    //Merchant code provided by eSewa
    product_code: string;
    //Success URL: a redirect URL of merchant application where customer will be redirected after SUCCESSFUL transaction
    success_url: string;
    //Failure URL: a redirect URL of merchant application where customer will be redirected after FAILURE or PENDING transaction
    failure_url: string;
    //Unique field names to be sent which is used for generating signature
    signed_field_names: string;
    //hmac signature generated through above process.
    signature: string;

    payment_url: string;
}
signature key field has its own process of generating the hmac signature which is mentioned in eSewa Documentation.
The Same applies to the signed_field_names.
payment_url is an additional field added to return the proper API link (test or live) currently in use.
- Verify method
This method is responsible for verifying the transaction data from the backend, marking the transaction as SUCCESS if valid.
It accepts an object with the encodedData key, which is the Base64 encoded response from eSewa server while re-direction to the successUrl key.
eSewa NestJS npm package handles all the process of decoding the Base64 to Json, integrity check of signature field and then sending request to the eSewa server for validition of the payment.
export interface EsewaResponseDto {
    productCode: string;
    transactionUuid: string;
    totalAmount: number;
    status: string;
    refId: string;
}
On success, the method returns data including refId, the payment provider ID given by the eSewa server.
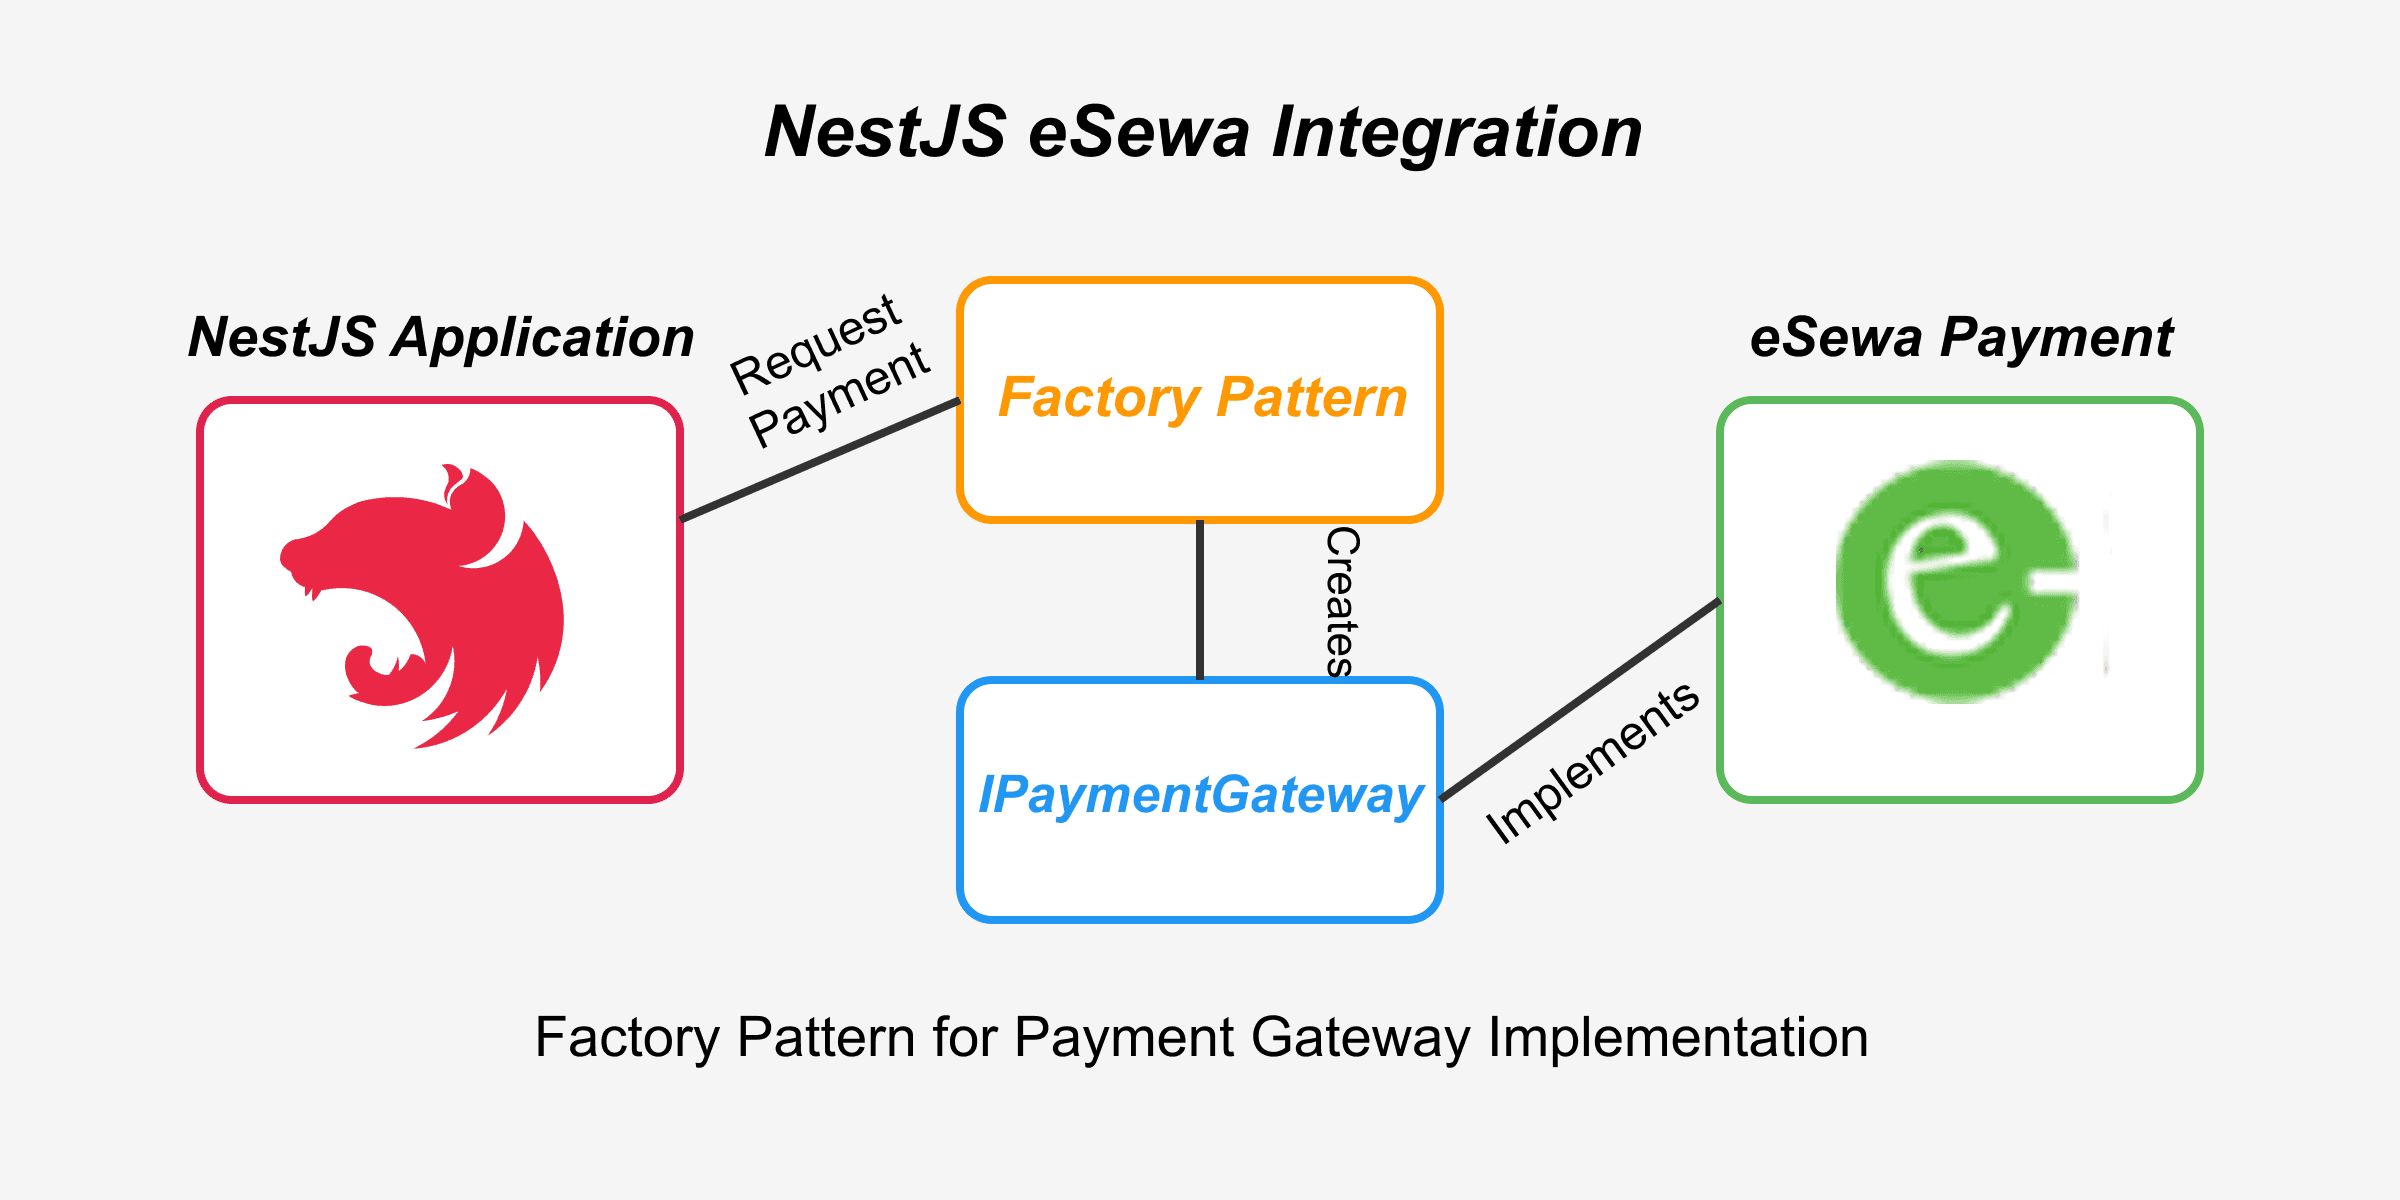
This blog is the continuation of Integrating Online Payment in NestJS using Factory Pattern.
For a detailed implementation and complete code, please visit the Github repository.
With these 4 simple steps, you can integrate ESEWA online payment without modifying anything in your controller, service or repository layers.
In Part-3, we will integrate KHALTI online payment.
Conclusion
By following these four simple steps, you can integrate ESEWA payment provider in your web apps. For further assistance or clarity contact info@dallotech.com

.png&w=3840&q=75)
In the second part of this series, we move beyond model training and bring our fine-tuned Microsoft Phi-1 to life. This article focuses on query generation, safe SQL execution, and building a Flask-based API that allows real-time interaction with financial databases.

In today’s data-driven world, being able to query databases with natural language is becoming increasingly valuable. Imagine simply typing: “Show me the total interest income of Kumari Bank in April 2022” and instantly receiving a valid SQL query (and even the corresponding chart!) — no manual SQL writing required.

Discover the power of vibe coding building a Discord attendance bot with AI, transforming a clunky biometric system into a modern solution. Learn how AI-driven development can revolutionize your business, contact DalloTech for custom solutions!


Explore the essentials of IP binding in Dockerized applications with this insightful Dallo Tech blog post. Gain expert tips and best practices to optimize your containerized workflows effectively.
